
Most people pick a cut style in a few seconds, on a checkout page, from two thumbnails that look almost identical. I have watched that quick click turn into bent corners, lost afternoons spent peeling tiny stickers, and invoices nobody expected. This guide covers what those thumbnails never show.
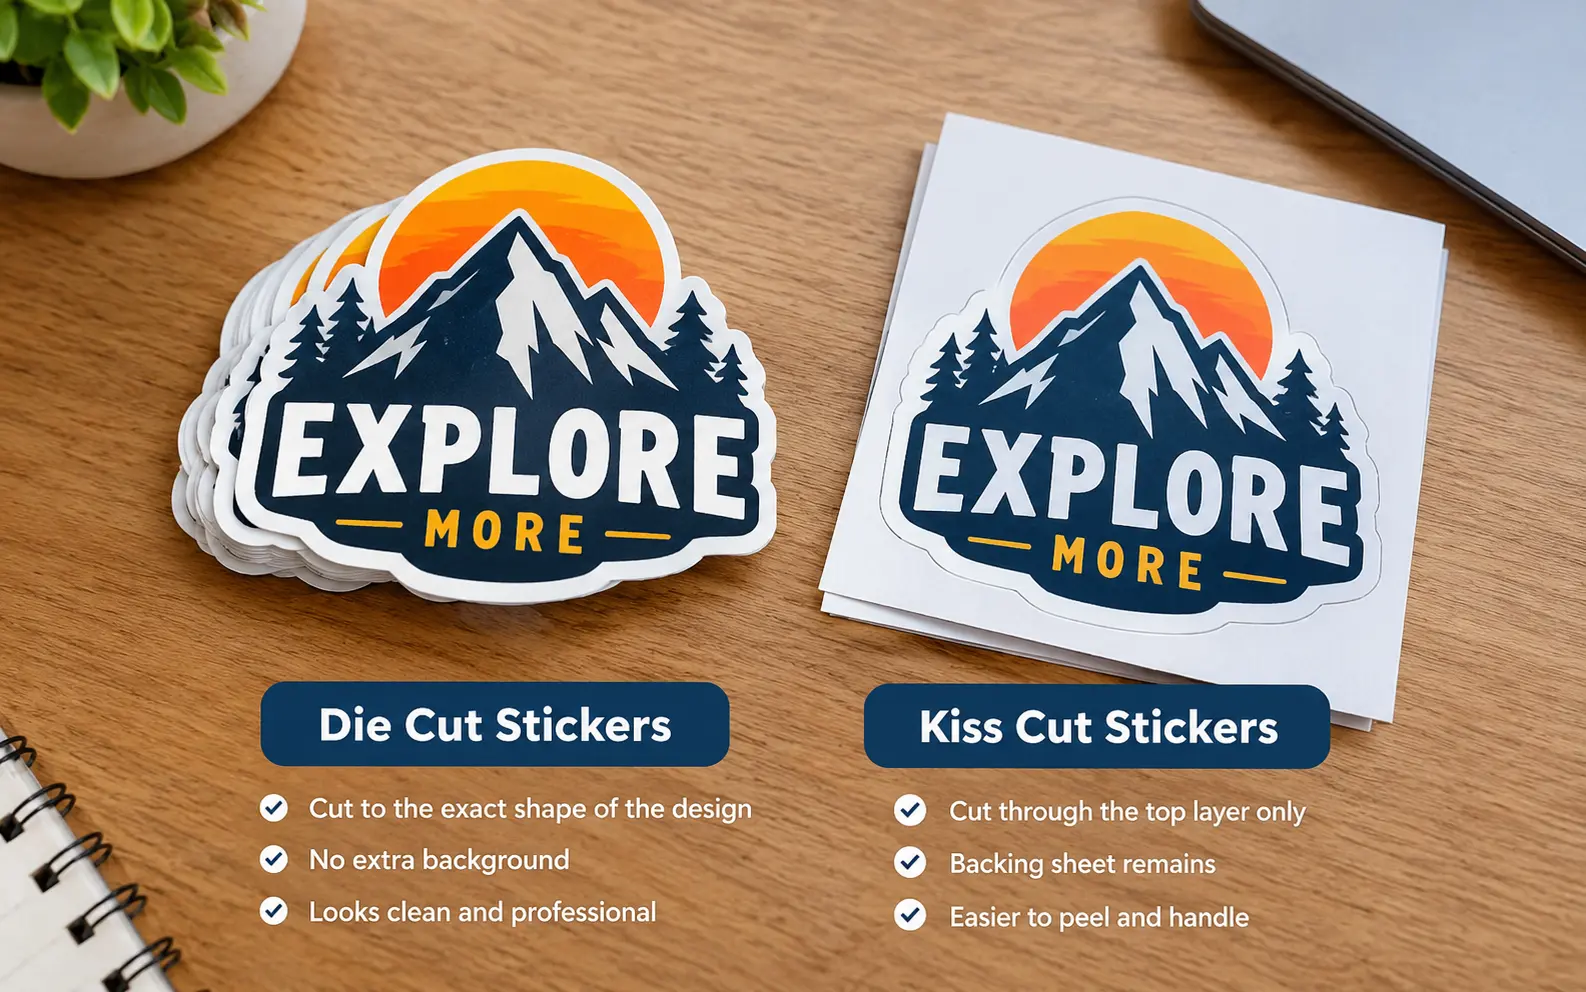
A die cut sticker is cut through both the vinyl and its backing, so you get one standalone piece in the exact shape of your artwork. A kiss cut sticker is cut through the vinyl only, so it stays on a larger backing that makes peeling easier and shields the edges. Pick die cut for single, borderless stickers handed out one at a time, and kiss cut for sheets, small or fiddly shapes, and anything that has to survive shipping.
Judge the Journey, Not the Finished Sticker
Once a sticker is on a laptop lid, nobody can tell which cut it started as. The difference lives in the days before that: storage, shipping and the first peel. That is where I judge every order.
- Storage: Die cut stickers have no frame, so their edges sit exposed. A warm drawer, or a rubber band around a stack, is enough to lift corners. Sheets lie flat in a folder for months with no edge damage.
- Shipping: Loose die cuts shift inside an envelope. A sheet with a cardboard backer stays rigid and arrives looking the way it left.
- First peel: Someone has to find an edge with a fingernail. Larger sheets give them a corner of liner to grab, while a small die cut gives them almost nothing.
Before anything else, I ask one question: how many hands and how many days sit between the printer and the surface? Few hands and few days favors die cut. Many of both favors kiss cut.
Why Price Advice Online Contradicts Itself
Read five guides and you will hear that kiss cut is cheaper, that it costs more, and that the two cost about the same. All three claims can be true, because price follows how many stickers share one backing, not the cut itself.
Here is a real example. CustomStickers.com publishes its prices inside its own guide. When I checked in October 2026, 100 sheets at 6 by 4 inches in matte cost $138.99, and 100 die cut stickers at 2 inches in matte cost $39.99. If each sheet carries six stickers of about 1.75 inches, that is 600 stickers at roughly $0.23 each, against about $0.40 each for the die cuts. Sizes are not identical and prices change, but the pattern holds: sharing a backing pushes the cost per sticker down.
Flip the scenario and the picture reverses. One design on its own full backing pays for that whole backing to deliver a single sticker, so it can land at or above the die cut price. Intricate outlines add cost on either cut.
So compare cost per finished sticker at the same size, material and quantity. Then ask the printer to quote both cuts for your exact artwork.
Match the Cut to the Situation
Here is how I would decide for the most common jobs.
| Situation | Better cut | Why it wins |
|---|---|---|
| Sticker pack sold at a market or online | Kiss cut | Buyers see every design at once, and one sheet is cheaper to pack and post |
| Conference or event giveaway | Die cut | Handed over individually, and it feels finished the moment someone picks it up |
| Sticker tucked into an e-commerce order | Die cut | Slips into the parcel without adding bulk, and the customer pulls out one clean piece |
| Planner and journal stickers | Kiss cut | Users peel one at a time over weeks, and the rest stay protected |
| Tiny stickers under about 1 inch | Kiss cut | Spare liner to grip makes the difference between peeling and fighting |
| Fine lettering or spindly outlines | Kiss cut | Fragile points are supported until the moment of use |
| Hundreds applied by hand in one shift | Kiss cut on a roll | Fast, repeatable peeling with no fumbling |
| Classroom rewards for young kids | Kiss cut | Small fingers cope far better with a larger sheet |
| Premium logo sticker sold singly in a sleeve | Either | Die cut looks cleaner in the sleeve, while kiss cut ships stiffer |
Edge Cases Most Guides Skip
Thin Necks and Sharp Points
Any die cut shape with a narrow neck, a spike or a skinny tail is a peeling risk. The weak spot folds or tears before the rest of the sticker releases. I keep narrow sections at least 1/8 inch (3 mm) wide and soften sharp tips slightly. If the artwork cannot change, that is the moment to switch to kiss cut.
Postage and the Flat Mailer Problem
A 4 by 6 inch sheet slides into a standard envelope or a greeting card without bulking up the parcel. Thin and flat items can qualify for lighter postage tiers with many carriers, so weigh a finished mailer before you set a shipping price. This matters more than people expect when a sticker costs less than the postage to send it.
Cuts That Went Wrong
Printers calibrate blade pressure by eye and by test, and batches drift. When a delivery arrives, I check three things on stickers pulled from different parts of the order:
- Too deep: The liner shows grooves or a perforated look, and stickers drop out when you bend the sheet.
- Too shallow: The vinyl does not separate cleanly, so a thin film lifts with the sticker or tears at a corner.
- Drifted: The cut line has slid sideways, leaving a white sliver on one edge. Check the corners first.
Photograph anything suspicious right away. Most printers set a short window for reporting defects, so read yours before the box gets buried.
Prepare the Artwork So Either Cut Behaves
The file setup is nearly the same for both, and getting it right prevents most reprints.
- Cut path: Put it on its own named layer, usually as a spot color, in a vector file such as AI, EPS or PDF.
- Bleed: Extend artwork about 1/8 inch (3 mm) past the cut path so a small drift never shows bare liner or white.
- Offset border: A thin white or colored border, around 1/16 inch, hides tiny registration shifts better than artwork that stops right at the edge.
- Corner radius: Round sharp corners slightly to reduce lifting and tearing during the peel.
- Safe zone: Keep text and key details about 1/8 inch inside the cut line.
- Sheet spacing: Leave at least 1/8 inch between neighboring designs so one cut never clips the next sticker.
Making Either One at Home With a Cutting Machine
Home machines change the question. Most desktop cutters produce a kiss cut by default, and some, like the Liene PixCut S1, can only do that. A true die cut at home means pushing the blade through the release liner as well, which usually wears blades faster and is harder on the cutting mat.
My routine is simple. I run a test cut on scrap sticker paper, raise the blade pressure in small steps until the vinyl releases cleanly, then stop. If I want the die cut look, I kiss cut first and trim the liner by hand with scissors, leaving about a 1/16 inch margin. Settings vary by machine, material and laminate, so treat any number from a forum as a starting point and not a rule.
Settle It With a Small Test Order
When the decision is genuinely close, I stop debating and order 25 of each in the same size and material. Then I track three things for a month: how many arrive damaged, how many peel complaints come in, and which one buyers choose when both are listed. For giveaways, I watch which stickers people actually take from the table and stick on something.
Twenty-five stickers is a small price for data that replaces a coin flip.
Frequently Asked Questions
Is contour cut the same as die cut?
In most sticker shops, yes. Contour cut is the older name for cutting through the vinyl and liner along the outline of the artwork. If a product page uses either term, the result is a shape-cut sticker with no frame of liner.
Why did my die cut order arrive on a square backing?
Naming is not standardized across shops. Some printers use "die cut" to describe the shape of the vinyl even when the liner stays rectangular. Check the product photos, or ask the printer how singles are delivered before you pay.
What is the smallest sticker that still peels well as a die cut?
There is no hard rule, but I get nervous below about 1 inch (25 mm), especially with thin outlines. At that size, a spare edge of liner starts to matter more than the look of a clean cut.
Are die cut stickers waterproof?
Waterproofing comes from the vinyl and laminate, not from the cut. A die cut on vinyl with a protective laminate handles water well, while one on plain paper stock will not. Exposed edges on outdoor stickers can still lift over time, so ask the printer about weather ratings.
How should I store sticker sheets so they do not curl?
Keep them flat, in a cool and dry place, ideally inside a folder or a clear sleeve with a stiff card. Heat is the main enemy because it softens adhesive and makes corners lift. Avoid rolling sheets unless they were made as a roll.
Can kiss cut stickers come on a roll?
Yes. Roll format is common for labels and for stickers applied in volume, since the liner feeds smoothly and each piece peels cleanly. Ask the printer about roll direction and core size if you plan to use an applicator.
Can I sell kiss cut stickers without a sleeve?
You can, but I rarely do. A clear sleeve with a card backer protects the print from fingerprints and scuffs, and it makes a small item look more finished at a market stall or in a parcel.
Can I mix die cut and kiss cut in the same order?
Usually they are separate products, so expect separate line items and quantities. Some printers will combine them for a single shipment, which can save on postage. Ask before you place two separate orders.