We have watched plenty of good photos fall apart at 24 × 36 inches. A file that looks crisp on a laptop turns mushy, blocky or awkwardly cropped on a wide-format printer, and the printer is almost never the culprit.
This is the process we run before any large print leaves our hands: the math, the upscaling choice, and the file checks that save a reprint.
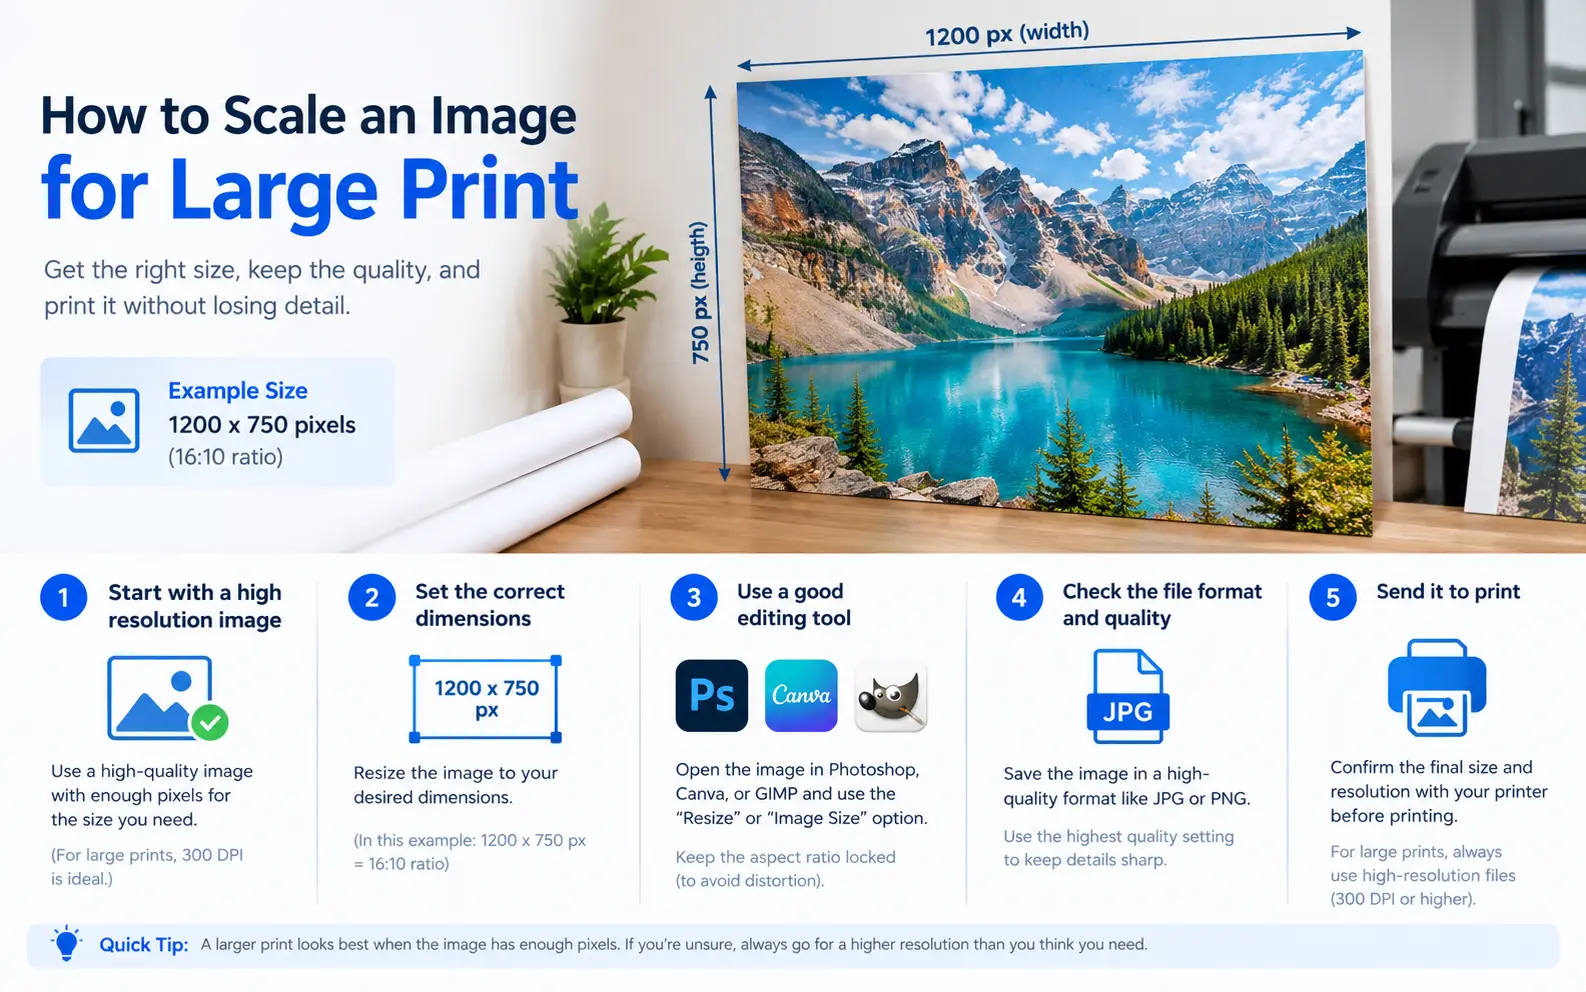
To scale an image for large print, multiply the final print size in inches by the PPI your viewing distance requires, resize to that pixel count with a detail-preserving or AI upscaler, then sharpen at final size and export a lossless TIFF or print-ready PDF. Prints viewed from 3 feet or more look sharp at 100 to 150 PPI, so 300 PPI only matters for work inspected up close.
How Many Pixels a Large Print Actually Needs
The human eye resolves detail down to roughly one arcminute. Turn that into print terms and you get a minimum PPI for any viewing distance:
Minimum PPI ≈ 3438 ÷ viewing distance in inches
At 3 feet (36 inches), that works out to about 95 PPI. We never print at the bare minimum, though, because people always step closer to anything interesting. Doubling the acuity figure gives a target that survives a curious viewer.
Not sure how far away people will stand? A comfortable viewing distance is usually 1.5 to 2 times the print’s diagonal. A 24 × 36 print has a 43-inch diagonal, so most people settle around 5 to 6 feet away.
| Print size (inches) | Typical viewing distance | Target PPI | Pixels needed | Megapixels |
|---|---|---|---|---|
| 8 × 10 | 1 ft | 300 | 2400 × 3000 | 7.2 |
| 16 × 20 | 2 to 3 ft | 200 | 3200 × 4000 | 12.8 |
| 24 × 36 | 4 to 5 ft | 150 | 3600 × 5400 | 19.4 |
| 40 × 60 | 6 to 8 ft | 100 | 4000 × 6000 | 24 |
| 36 × 72 (banner) | 10 ft or more | 50 | 1800 × 3600 | 6.5 |
| 168 × 576 (14 × 48 ft billboard) | 50 ft or more | 15 | 2520 × 8640 | 21.8 |
Notice the pattern: a 24 MP camera covers almost every row. Large prints rarely need giant files, they need files matched to how they’ll be seen.
A worked check we do on every job: divide the image’s long side in pixels by the print’s long side in inches. A 6000 × 4000 file on a 36-inch print gives 167 PPI, comfortably sharp. Stretch the same file to 60 inches and you land at 100 PPI, which is fine for a hallway but risky for a gallery where buyers lean in at arm’s length.
Step-by-Step: Scaling the File Without Wrecking It
This is the order we follow in Photoshop, GIMP or Affinity Photo. The sequence matters more than the software.
- Find the true original. Ask for the RAW file or the first export, never the copy that went through WhatsApp, email or a website. Every pass through a messaging app strips pixels and adds compression blocks that enlarge badly.
- Crop to the print’s aspect ratio first. A 3:2 camera file drops straight onto 24 × 36, but a 16 × 20 (4:5) print cuts about 17% off the long side. Cropping before you enlarge means you only upscale the pixels you’ll keep.
- Clean up noise before enlarging. Grain and sensor noise get magnified along with everything else. A light noise reduction pass now prevents a gritty sky later.
- Switch to 16-bit. Big smooth gradients, like sunsets or studio backdrops, band visibly on large prints. Working in 16-bit during the resize keeps those transitions smooth.
- Resample with the right method. In Photoshop, open Image > Image Size, tick Resample, and choose Preserve Details 2.0. In GIMP 2.10 or later, use NoHalo or LoHalo; in Affinity, use Lanczos 3.
- Match your printer’s native input resolution. Epson large-format printers work natively at 360 PPI (or 180 as a clean half), while Canon and HP use 300 or 600. Landing on those numbers stops the printer driver from doing its own, cruder resample.
- Enlarge in one pass. The old trick of stepping up 10% at a time dates from basic bicubic interpolation. Modern resamplers handle the jump in a single move.
- Sharpen for output, at final size. Apply sharpening only after resizing, judging it at 50% zoom rather than 100%. Matte paper and canvas soak up ink and need noticeably more sharpening than gloss or metallic.
- Print a test strip. Crop an 8 × 10 section containing the most critical detail (eyes, text, fine foliage) at full final scale, and print it on your home printer. That small sheet shows exactly how the big print will look up close, for the price of one page.
- Export without loss. Save a flattened TIFF with LZW compression or a print-ready PDF. If you must send JPEG, save once at maximum quality.
Choosing an Upscaling Method: What Each One Is Good At
When the pixel count from the table above isn’t there, you need to invent the difference. Each tool invents it differently, and the wrong pick shows up as soft edges, plastic skin or garbled lettering.
| Method | Best for | Practical enlargement | Watch out for |
|---|---|---|---|
| Classic resampling (Preserve Details 2.0, Lanczos, NoHalo) | Good photos needing a modest boost | Up to about 2x | Gradual softness past 2x |
| Photoshop Super Resolution / Lightroom Enhance | RAW and high-quality JPEGs | Exactly 2x per side (4x the pixels) | Can only run in that fixed 2x step |
| Dedicated AI upscalers (Topaz Gigapixel and similar) | Phone shots, older digital files, big jumps | 2x to 6x | Invented textures, waxy skin, warped text |
| Online AI upscalers | Quick fixes when you have no software | 2x to 4x | Output size caps, recompressed downloads, privacy of uploads |
| Vector redraw (Image Trace, manual tracing) | Logos, icons, text, line art | Unlimited | Useless for photographs |
| Letting the print shop’s RIP resample | Banners and signs viewed from far away | Any | You lose control over sharpening |
AI upscalers deserve a specific warning. They don’t recover detail, they predict it, and the predictions go wrong in recognizable places: faces that look subtly like someone else, letters on signs that turn into nonsense, and brick or foliage that repeats in a pattern.
We always inspect three zones at 100% after an AI pass: faces, any text, and fine repeating texture. If one fails, we blend the AI layer with a classic resample of the same area using a layer mask.
One more practical rule from mixed artwork jobs: never upscale a logo. Ask for the AI, EPS, SVG or PDF version, and if none exists, redraw it. A soft logo on a 6-foot banner makes the whole job look cheap.
Preparing the File a Print Shop Will Accept
A perfectly scaled image can still get bounced by pre-press. These are the checks we run before uploading anything over poster size.
- File size limits: Photoshop’s PSD format caps at 30,000 pixels per side and 2 GB, and TIFF tops out at 4 GB. For murals and wall wraps, save as PSB (up to 300,000 pixels) or build the file at 1:10 scale with ten times the target PPI, then label it clearly.
- Bleed by product: Posters need about 0.125 inch per side. Canvas gallery wraps need 1.5 to 2 inches extra per side so the image folds around the stretcher bars, and wall murals need 2 to 4 inches to cover uneven walls and trimming.
- Safe zones: Banners with hems and grommets eat into the edges. Keep text and faces at least 1.5 to 2 inches inside the trim line.
- Color handling: Ask the shop for its ICC profile and soft proof with it (View > Proof Setup in Photoshop). Many inkjet labs prefer RGB files because their printers reach colors CMYK can’t, so don’t convert to CMYK unless they ask.
- Fonts and vectors: Outline or embed every font in PDFs. A missing font silently swaps to a default and can reflow a headline.
- File naming: Put the size, scale and color mode in the name, for example lobby-mural_120x96in_1-10scale_RGB.tif. It prevents the most common pre-press mix-up, printing a scaled file at the wrong size.
Edge Cases We Run Into Most
The standard workflow handles most files. These situations need a different plan.
- Old printed photos: Calculate scan resolution as target PPI × enlargement factor. Taking a 4 × 6 print to 24 × 36 is a 6x jump, so a 150 PPI target means scanning at 900 PPI. Past roughly 1200 PPI, most consumer flatbeds capture paper grain rather than new detail.
- Images pulled from social media: Instagram serves images at around 1080 pixels wide, which is only about 7 inches at 150 PPI. No upscaler fixes that gracefully, so we always ask the client for the original before quoting a large print.
- Printing to an exact physical size: The “Fit to page” option in print dialogs quietly rescales your image. Choose Actual Size or 100%, then measure a printed test square with a ruler to confirm.
- Small text inside a photo: Lettering shows softness long before skin or landscape does. If a menu board or sign must be readable, overlay the text as vector type instead of relying on upscaled pixels.
- Panoramas and huge murals: Shooting several overlapping frames and stitching them gives you real pixels instead of predicted ones. A six-frame stitch from a 24 MP camera easily clears 80 MP.
- Genuinely blurry originals: Missed focus and motion blur are different problems from low resolution. Upscaling enlarges the blur too, so the honest fix is a smaller print or a textured medium like canvas.
- Triptychs and multi-panel sets: Scale one master file and slice the panels from it. Scaling panels separately leads to mismatched sharpening and color between frames that sit side by side.
Frequently Asked Questions
Can I print a 72 DPI image at a large size?
Yes, if it has enough pixels. The 72 DPI tag is just metadata that web exports and phones attach; a 6000 × 4000 file tagged 72 DPI holds exactly the same detail as one tagged 300. Change the PPI number with resampling turned off and the print size updates without touching a single pixel.
How big can I print a 12 MP phone photo?
A 12 MP phone image (4032 × 3024 pixels) prints at about 168 PPI on an 18 × 24 inch poster. That size is also a perfect 4:3 match, so nothing gets cropped. Go to 24 × 32 and you’re at 126 PPI, still fine on a wall viewed from a few feet.
Should I upscale the image myself or let the print shop do it?
Do it yourself when quality matters. A shop’s RIP software resamples with basic interpolation and no output sharpening tuned to your image. For banners and signs seen from across a room, letting the shop handle it is usually fine.
Does canvas hide low resolution better than photo paper?
Yes. Canvas texture breaks up fine detail, so 100 to 120 PPI often looks as good on canvas as 200 PPI does on smooth paper. Glossy and metallic papers are the least forgiving surfaces.
Can AI upscaling fix a blurry photo?
Not reliably. AI upscalers add pixels and can sharpen edges, but motion blur and missed focus require the tool to guess what was there. Results on faces and text often look convincing at a glance and wrong on inspection.
Why does my large print look darker than my screen?
Most monitors run far brighter than a print viewed under room lighting. Calibrate your screen to around 80 to 120 cd/m² for print editing, and soft proof with the lab’s profile before ordering.
How do I print a large image at home on regular paper?
Use poster or tiling mode, available in Adobe Acrobat’s print dialog and in free tools like The Rasterbator. Set an overlap of about 0.25 inch between sheets so you can trim and align the seams cleanly.
How large will my file be for a 24 × 36 print?
At 150 PPI, a 24 × 36 print needs 3600 × 5400 pixels, which is about 58 MB as an uncompressed 8-bit RGB TIFF. In 16-bit, the same file roughly doubles to about 117 MB, so check the shop’s upload limit first.