
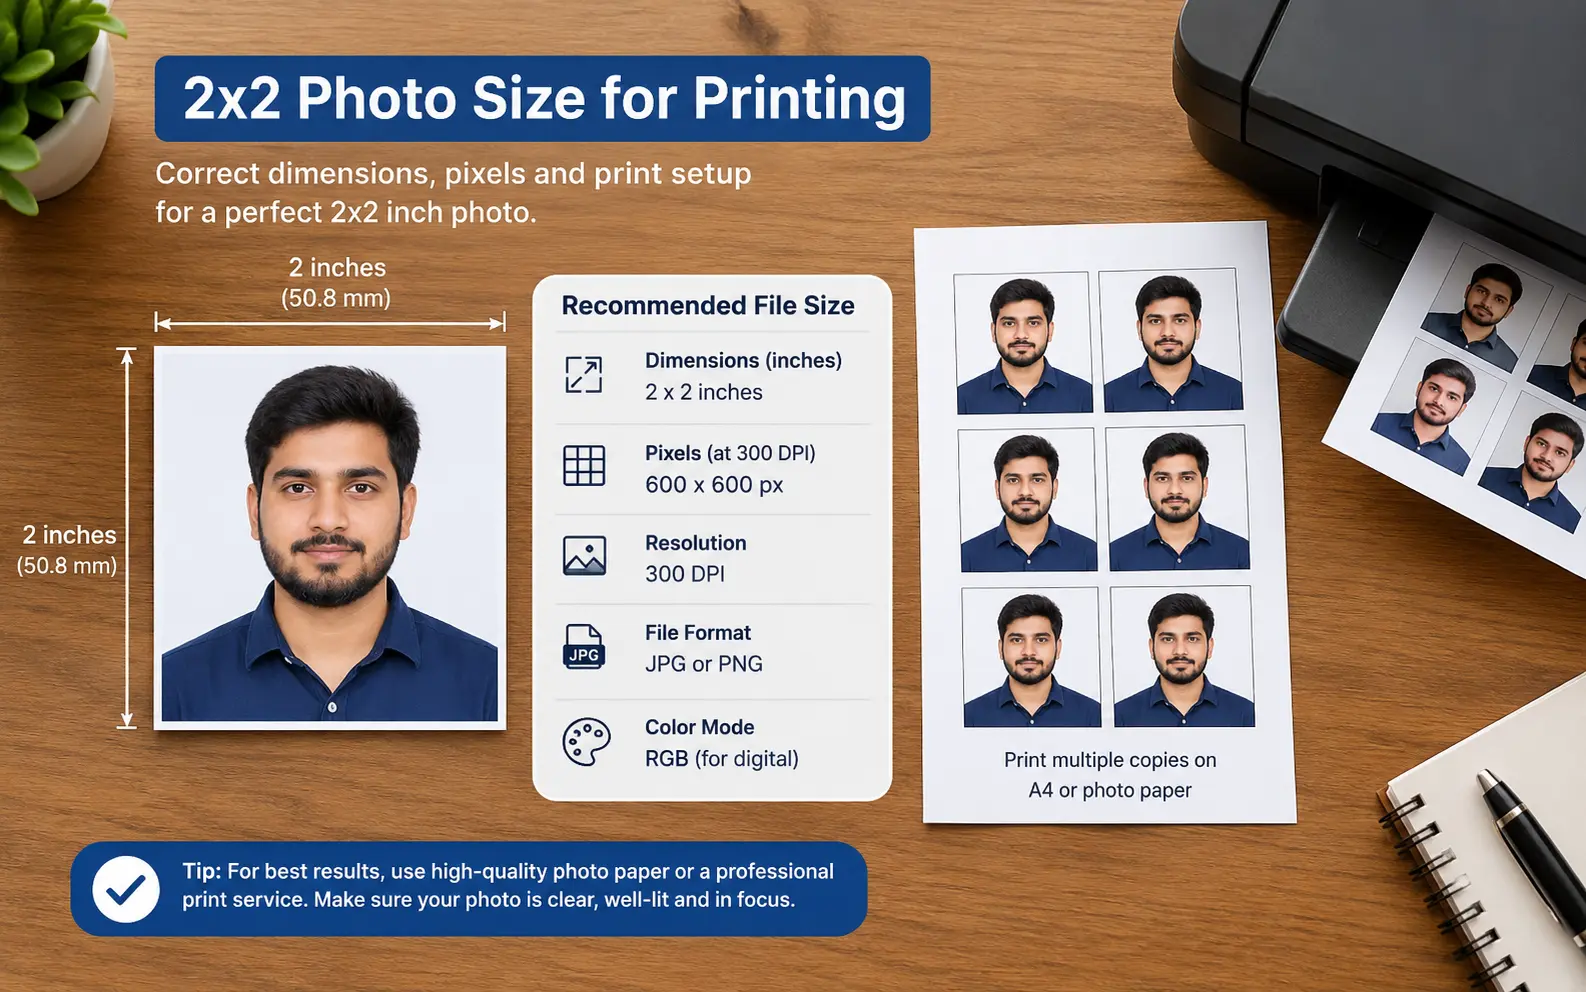
Most rejected 2x2 prints are not bad photos. They are good photos that a printer quietly resized.
To size a 2x2 photo for printing, crop your image to a square, scale it to 600 x 600 pixels (2 x 2 inches at 300 DPI), and print it at 100% with no fit-to-page or borderless setting. After printing, the head must measure 1 to 1 3/8 inches from chin to top of hair. The easiest layout is six copies on one 4x6 sheet, which is an 1800 x 1200 pixel file.
Why Printed 2x2 Photos Come Out the Wrong Size
When a print looks off, I check three things before I blame the photo. The file is rarely the problem. The print step is.
- Fit-to-page scaling: Print dialogs often default to "fit" or "fill," which stretches a small image to the paper. A 2x2 file sent to a 4x6 sheet this way can come out close to 4 inches wide.
- Borderless overscan: Borderless mode enlarges the image slightly so it bleeds past the paper edge. A 2 inch square ends up a little larger, and the head grows with it.
- Lab auto-crop: Kiosks and web order forms crop to fill the print shape. A square file gets sliced to fit the 3:2 shape of a 4x6 unless you switch that off.
A fourth cause starts earlier. A crop can be the right shape and still have the wrong zoom. Head size is judged on the paper, so a square that looks fine on screen may hold a head that is too big or too small once printed.
Check Your Source Photo Before You Crop
Resolution decides whether a print looks sharp or grainy. The State Department rejects blurry, grainy or pixelated prints and prints with visible printer dots, so this check saves a wasted trip.
The test is simple. Open the original and measure the head from chin to the top of the hair in pixels. For a 600 px square with the head at 60% of the height, you need about 360 px of head in the source. Less than that means the crop gets enlarged, and enlarged photos print soft.
| Item | At 300 DPI | At 600 DPI |
|---|---|---|
| 2x2 inch photo | 600 x 600 px | 1200 x 1200 px |
| 4x6 inch sheet | 1800 x 1200 px | 3600 x 2400 px |
| Head height needed in the source (60% head) | 360 px | 720 px |
A phone shot taken from a few feet away almost always clears this bar. A photo taken from arm's length and cropped hard often does not. When in doubt, retake it from farther back instead of zooming in the camera app.
Crop and Scale Step by Step
You can do this in the State Department's free photo cropper, which is built for paper applications, or in any editor that lets you set exact pixel sizes. Either way, crop and resize only. Filters, retouching and background swaps are not allowed on the photo itself.
- Draw a 1:1 square around the head and shoulders, with the face centered left to right.
- Set the zoom so the head, hair included, fills 50% to 69% of the square's height. On a 600 px square, that is 300 to 414 px from chin to crown.
- Check the eye line. The eyes should sit 56% to 69% of the way up from the bottom edge, which is 336 to 414 px on a 600 px square.
- Resize to 600 x 600 px. Scale down from your crop. Never scale up.
- Export as a high-quality JPEG with 300 DPI in the file settings, and save it once. Re-saving a JPEG repeatedly adds compression blur.
One trick I use: draw two horizontal guide lines 300 px apart and 414 px apart in the editor, then check that the distance from crown to chin falls between them. It takes ten seconds and removes the guesswork.
Build a 4x6 Sheet With Six Copies
A single 2x2 is awkward to print. A 4x6 sheet is the standard photo size at every lab and fits most home photo printers, so put several copies on one.
Create a blank canvas of 1800 x 1200 px. Place your 600 x 600 px photo in a 3 by 2 grid: three across the 1800 px width, two down the 1200 px height. Each square then lands at exactly 2 x 2 inches when the sheet prints at full size.
Two details matter here:
- No gaps: Six squares use the whole sheet, so every cut must be straight. Add thin light-gray cut guides if you like, but keep them outside the photo area.
- Clean edges: A damaged photo with creases or smudges is not accepted, so use a paper trimmer or a rotary cutter and a ruler instead of scissors.
The extra copies are useful. Passport photos get lost, and many other forms ask for two.
Print Settings That Hold 2 Inches Exactly
The wording of the dialog changes between Windows, macOS and printer brands, but the settings you want are the same everywhere.
- Scale: Choose 100% or "Actual size." Turn off fit to page, fill page and shrink to fit. If your software only offers a percentage, use 100.
- Paper: Load matte or glossy photo paper and select that paper type in the dialog. Plain paper, photocopies and scans of a print are not accepted.
- Quality: Use the highest print quality setting your printer offers.
- Auto-correct: Switch off red-eye fix, auto-enhance and any smart color tool. Software that alters the photo can get it rejected.
- Margins: Home printers add unprintable margins, so a full 4x6 sheet needs borderless mode. Test it before you trust it.
Borderless is where home printing goes wrong most often. If your test print measures over 2 inches, skip it. Put the 600 px photos on a letter-size canvas (2550 x 3300 px at 300 DPI) with normal margins instead, print at 100%, and trim each square by hand.
Before you spend photo paper, print one test page on plain paper at the same settings. Hold a ruler to it. If the squares measure exactly 2 inches, run the real sheet.
Print at Home, at a Lab, or In Store
Each route has a catch, and the catch is usually where people lose a day.
- Home printer: Cheapest if you already own photo paper, and you control every setting. The risk is borderless enlargement, so measure the result.
- Lab order (CVS, Walgreens, online print shops): Upload the 1800 x 1200 px sheet as a 4x6 print. A standard 4x6 print has been quoted at roughly $0.20 to $0.40, though prices vary by store. Turn off auto-crop and auto-scale in the order form, then measure the print when you pick it up.
- Walmart Photo Center: This is a take-and-print service. Walmart's own FAQ says associates shoot the photo in store, so you cannot bring your own file. The listed price at the time of writing was $7.64.
I would send a lab order only after a home test print confirms your file is built right. If the lab print comes back at the wrong size, you then know the lab's crop or scale setting is the cause, not your file.
Run the Ruler Test Before You Submit
Every print gets a two-minute check. Use a metal or clear plastic ruler with millimeter marks, because millimeters are easier to read than sixteenths of an inch.
- Edges: Measure each side. You want 51 mm (2 inches) in both directions, so a rectangle means the printer or lab cropped it.
- Head: Measure from the top of the hair to the bottom of the chin. The result should land between 25 and 35 mm.
- Eye line: Measure from the bottom edge up to the eyes. Expect 28 to 35 mm.
- Surface: Look at the print under a bright light, ideally with a magnifier. Dots, banding, creases or smudges mean you reprint.
- Color: Compare skin tone with the screen. A green or blue cast fails the accurate color rule.
If measurement 2 or 3 is off while measurement 1 is correct, the print is fine and the crop is wrong. Go back to the crop step and adjust the zoom, then reprint.
Edge Cases That Trip People Up
- Babies and toddlers: The sizing steps are identical, but the source photo is harder. Shoot a little wider than you think you need, so there is room to crop to the head size range. The State Department accepts a baby whose eyes are not fully open, while older children need open eyes. No other person, hand or pacifier can show in the frame.
- Other countries' photos: A 2x2 square suits US documents and several others, but plenty of countries want a rectangle such as 35 x 45 mm. Check the issuing authority's size before you build the sheet.
- Keepsake print services: Wallet-print shops cut to the layout you upload, and none of them check passport rules for you. They suit scrapbooks and lockets, not applications.
- Glasses, hats and background: These are composition rules, not sizing rules, so no crop can fix them. Retake the picture instead of trying to edit it.
Quick Troubleshooting Guide
| What you see | Likely cause | Fix |
|---|---|---|
| Squares measure over 2 inches | Borderless enlargement | Print at 100% on a letter sheet with margins, then trim |
| Squares are rectangles | Lab auto-crop, or a canvas that is not 1800 x 1200 px | Turn off auto-crop and recheck the file size |
| Print looks soft | Source too small, so the crop was enlarged | Retake from farther back and crop smaller |
| Head too large or too small | Zoom set wrong at the crop step | Recrop to the 300 to 414 px head range, then resize |
| Visible dots or banding | Low quality setting or plain paper | Use highest quality on photo paper |
| Skin tone looks off | Auto-enhance or the wrong paper type | Turn off auto-correct and pick the matching paper type |
Frequently Asked Questions
Is a 5x5 cm print the same as a 2x2 inch print?
Not quite. 5 cm is about 1.97 inches, while 2 inches is 51 mm. Some print shops label 5x5 cm as 2x2, so order or build the file at 51 mm when it is for an official form.
Does the DPI number saved in the file matter?
The pixel count matters more. A 600 x 600 px file tagged 72 DPI would open as an 8.3 inch image in some programs. Tag it 300 DPI so the saved size and the printed size agree.
How many 2x2 photos does a US passport application need?
The State Department's photo page asks for one color photo taken in the last six months. Other forms, such as immigration filings, often ask for two. Read the instructions on your specific form.
Can I use 5x7 paper instead of 4x6?
Yes. A 2100 x 1500 px canvas at 300 DPI holds the same six squares and leaves half an inch of spare paper on each long side. That spare edge helps if your printer will not do borderless.
What pixel size do I need for a digital upload?
The official digital rule is a square image between 600 x 600 and 1200 x 1200 px. That range applies to online submissions, not to the sheet you print.
Do I need a printed photo if I renew my passport online?
No. Online renewal uses a digital photo that you upload and crop inside the application. The printed sheet in this guide is for paper applications.
Can I size the photo on my phone?
Yes, with one catch. Many phone editors offer a 1:1 crop but never ask for an exact pixel size. Export the square, check its dimensions in the file info, and resize it to 600 x 600 px in a desktop tool or an app that accepts numbers.