
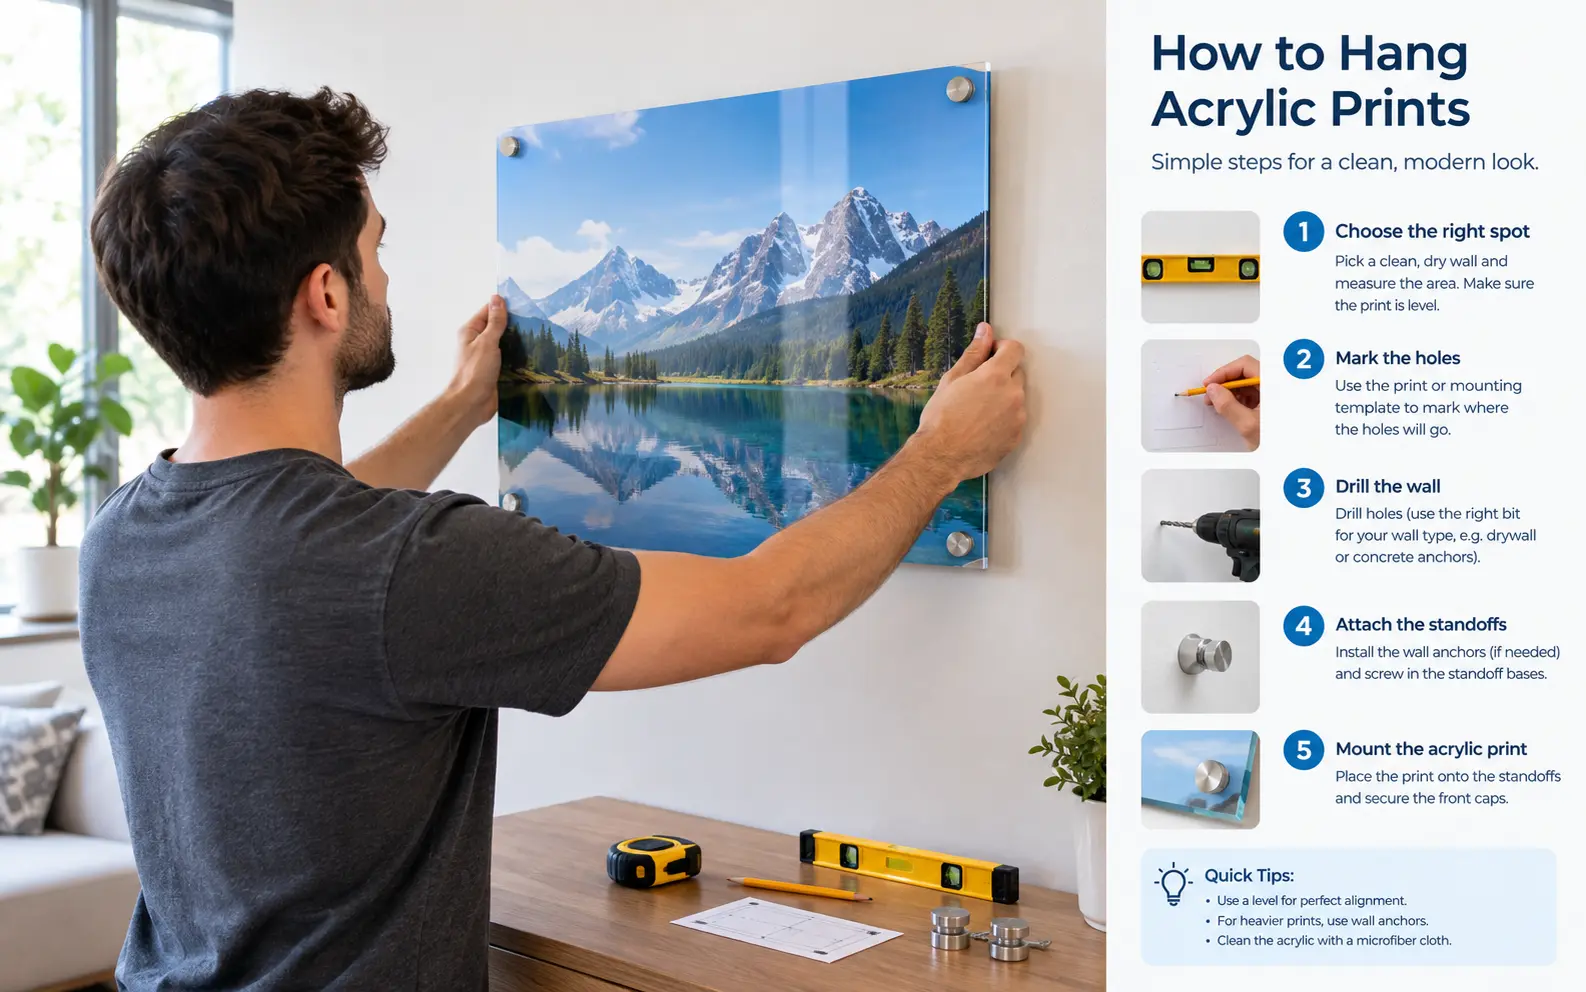
Acrylic prints look like they are floating on the wall when they are hung well. When they are hung badly, they crack at the corners, sit crooked, or reflect the window straight back at you.
To hang an acrylic print, match the hardware to the print's weight and your wall type. Standoff screws suit prints with pre-drilled holes. A French cleat or Z-clip works best for medium and large pieces. Wire, D-rings, or adhesive strips are only for small, light prints. Always use anchors rated for at least twice the print's weight, level the hardware before the print goes up, and never overtighten anything that touches the acrylic.
Before You Drill: Weigh It, Read the Back, Know Your Wall
Most failed installs go wrong before the drill comes out. I spend five minutes on these three checks every time, and they have saved me more patched walls than any tool.
Estimate Your Print's Weight
Acrylic is heavier than it looks, roughly half the weight of glass of the same thickness. The table shows the approximate weight of the acrylic sheet alone.
| Print Size | 1/8" (3 mm) Acrylic | 1/4" (6 mm) Acrylic | 1/2" (12 mm) Acrylic |
|---|---|---|---|
| 16 x 20 in | ~1.7 lb | ~3.4 lb | ~6.9 lb |
| 24 x 36 in | ~4.6 lb | ~9.3 lb | ~18.6 lb |
| 30 x 40 in | ~6.4 lb | ~12.9 lb | ~25.8 lb |
| 40 x 60 in | ~12.8 lb | ~25.8 lb | ~51.7 lb |
The numbers are calculated from acrylic's density of about 1.19 g/cm³.
- Add 25 to 50 percent if the print is face-mounted to an aluminum composite backing (often sold as Dibond) and has a subframe.
- Apply the 2x rule. Buy hooks, anchors, or cleats rated for at least double your estimated weight. Wall conditions are never as good as the lab tests behind the ratings.
- Weigh it if you're unsure. Stand on a bathroom scale holding the print, then subtract your own weight.
Read the Back of the Print
The hardware already attached to your print narrows your choices. Flip it over on a soft blanket and look for one of these:
- Four corner holes: Built for standoffs. Measure the hole spacing yourself, because it varies between labs.
- A wire across a wooden or aluminum frame: Hang it on hooks.
- An angled strip along the top: This is half of a French cleat. The matching wall piece should be in the box.
- Two D-rings: Hang them on two separate hooks, never on one.
- Nothing at all: See the section below on prints that arrive with no hardware.
Identify Your Wall Type
Knock on the wall and drill a small test hole somewhere hidden if you need to.
- Drywall sounds hollow and gives off white dust.
- Plaster sounds solid, feels hard, and often has wooden lath strips behind it.
- Brick or concrete gives off red or gray dust and resists a normal drill bit.
- Metal studs will stop an ordinary wood screw cold.
Choosing the Right Hanging Method
Once you know the weight and wall type, the choice usually makes itself.
| Method | Best Print Size / Weight | Look on the Wall | Difficulty | Main Risk |
|---|---|---|---|---|
| Adhesive strips | Under ~5 lb, small prints | Flush, no gap | Very easy | Letting go in heat or humidity |
| Wire + hooks | Up to ~30x40", light to medium | Slight float | Easy | Tilting over time |
| D-rings + two hooks | Framed acrylic, medium to heavy | Flush frame | Moderate | Hooks spaced unevenly |
| Standoffs | Any size with pre-drilled holes | Visible metal caps, floating | Moderate | Cracks from overtightening |
| French cleat / Z-clip | Medium to very large, heavy | Hidden, floating | Moderate | Crooked cleat means crooked print |
For anything over about 25 lb, I only use a cleat screwed into studs or into toggle bolts. Hooks alone are not enough at that weight.
Getting the Height and Position Right
Guides disagree on height. Some put the center of the art at 57 to 60 inches, others at 62 to 66. Both are right in different situations:
- 57 inches is the museum standard. It suits rooms where people mostly stand, like hallways and entryways.
- 60 to 62 inches suits taller households and very large prints. A big print centered at 57 inches can end up only a couple of feet off the floor.
- Over furniture, ignore the center rule. Leave 8 to 10 inches between the sofa back or console top and the bottom of the print.
- In dining rooms, hang a little lower, because people view the art while sitting.
Plan for Glare Before You Commit
Glossy acrylic acts like a mirror. Check the spot at the time of day you'll actually use the room.
- Avoid walls directly opposite windows. You'll see the window reflected in the print more than the image.
- Aim lights at about 30 degrees from vertical. A track light or picture light at that angle sends the reflection down to the floor instead of into your eyes.
- Consider non-glare acrylic for sunny rooms, especially if you're still ordering the print.
Step-by-Step: Installing Standoffs Without Cracking the Print
Standoffs cause more cracked prints than any other method. The damage almost never comes from a fall. It comes from a clamp that is too tight.
The reason is thermal expansion. Acrylic expands and contracts far more than the steel standoffs holding it, several times more than glass. If the caps pinch the acrylic, that movement has nowhere to go, and small stress cracks spread out from the holes over the following weeks.
- Make a paper template. Trace the print onto kraft paper and punch through the four hole centers. Tape the template to the wall and check it with a level. This means nobody has to hold a heavy sheet of acrylic in the air while you mark holes.
- Drill through the template marks. A 1/4" bit suits most standard plastic anchors. Use toggles if the print weighs over about 15 lb or you miss the studs.
- Seat the anchors flush with the wall. An anchor that sticks out pushes the standoff base off-angle.
- Screw on the standoff bases until they are snug against the wall.
- Put a soft washer on both sides of the acrylic, then thread the caps on finger-tight and stop. Don't use pliers, and don't add an extra quarter turn "to be safe."
- Leave the protective film on until the print is mounted, then peel it off starting from a corner.
Field tip: If one hole doesn't line up by a millimeter or two, don't force it. Loosen all four bases, shift them together, and retighten. Forcing one corner puts the whole sheet under stress.
Avoid drilling acrylic yourself. It needs plastic-specific bits, slow speeds, and a backing board, and face-mounted prints can delaminate. If your print didn't come with holes, choose another method or ask the lab to add them.
Step-by-Step: French Cleat and Z-Clip Installation
A cleat is my first choice for anything medium-sized or larger. The wall piece carries the load across its full width, and the print just drops onto it.
- Measure from the top edge of the print to the top of the cleat on its back. Write the number down.
- Mark your desired top-of-print line on the wall and measure down by that number. That line is where the top of the wall cleat goes.
- Level the wall cleat with its angled lip pointing up and toward the wall. A laser level makes this much easier on long cleats.
- Screw into at least one stud if you can. Use rated anchors everywhere else. Tug hard on the cleat before you hang anything on it.
- Lift the print slightly above the cleat, keep it close to the wall, and lower it until the two angles lock together.
The Step Everyone Skips: The Anti-Lift Screw
A cleat holds the print against gravity, but not against an upward bump. A child, a vacuum handle, or an earthquake can lift the print straight off. For busy homes, offices, or earthquake zones:
- Drive a short screw up through the bottom of the subframe into a small block or second cleat on the wall.
- Or add museum putty at the two bottom corners of the print.
Wire and D-Rings: Doing It Properly
Wire is easy, but a print on one nail will drift off level for as long as it hangs.
- Always use two hooks. Space them roughly a third of the wire's width apart, centered. Two contact points stop the print from swinging like a pendulum.
- Measure the wire under tension. Pull the wire up toward the top edge the way the hooks will hold it, then measure from that peak to the top of the print. Measuring the slack wire puts your hooks an inch or more too low.
- Get both D-ring hooks exactly level. The rings are fixed, so any height difference between the hooks shows up as a tilt in the frame.
- Add felt or rubber bumpers to the bottom corners. They keep the print from tilting forward and protect the wall.
Hollow-wall hooks, the kind you push in and twist, work well in drywall. They are useless in plaster, brick, or tile.
Adhesive Strips: When They Work and When They Fail
Strips are tempting in rentals. They work, but only in a narrow set of conditions.
They work when:
- The print is small and light, under about 5 lb.
- The wall is smooth, painted, clean, and indoors.
- The room stays at a steady, moderate temperature.
They fail when:
- The wall is textured, glossy, wallpapered, or freshly painted.
- The spot gets afternoon sun, sits above a radiator, or is in a steamy bathroom. Warm adhesive slowly creeps.
- The print weighs close to the package's rating. I treat the rating on the box as half its real-world value.
Stick the strips to the print's backing, not to bare acrylic. Press each strip firmly for 30 seconds, then wait an hour before putting any weight on it.
What to Do When Your Print Arrived With No Hardware
This comes up often with budget acrylic, where the print shows up as a bare, flat panel. You can't screw into acrylic, and you can't drill face-mounted prints safely. Bonding is the answer.
- Buy adhesive-backed hanging hardware. Look for aluminum hanging rails, Z-clips, or D-ring plates that use very high bond (VHB) acrylic foam tape. VHB is the same family of tape used to hold glass panels on buildings.
- Clean the bonding area of the backing with isopropyl alcohol. Only do this on metal or composite backing. Alcohol can craze bare acrylic.
- Press hard along the full length of the tape.
- Wait before hanging. VHB builds strength over time and reaches close to full bond after about 72 hours. Hanging the print the same day is how bonded hardware peels off.
For anything over about 10 lb, ask a local framer to attach a proper subframe. It costs little and removes the guesswork.
Wall-Specific Fixes
- Plaster: Put masking tape over the spot and drill, never hammer, or the plaster will crack in a spiderweb pattern. If you hit wood lath, it holds screws well. Toggle bolts work in the gaps between laths.
- Brick and concrete: Use a masonry bit with the drill in hammer mode, plus wall plugs sized to the bit. Solid brick holds better than mortar joints, but mortar is easier to patch later.
- Tile: Use a carbide or diamond tile bit, turn hammer mode off, and put tape over the tile so the bit doesn't skate. Drill through grout lines where you can, because cracked tiles are expensive to replace.
- Metal studs: Use toggle bolts through the stud face, or self-drilling screws made for metal. Wood screws won't bite.
Room Conditions That Shorten a Print's Life
- Direct sun: UV fades the ink over the years, and heat puts stress on the adhesives in face-mounted prints. North-facing walls or UV-filtering window film help.
- Fireplaces and radiators: Acrylic starts to soften well below the temperature of a fire. Keep prints several feet above a working fireplace and out of direct heat.
- Bathrooms and kitchens: Acrylic handles humidity fine, but wooden subframes and adhesives don't. Stainless standoffs are the safest choice in wet rooms.
- Fresh paint: Wait at least a week, and longer for strips or bonded hardware. Paint that feels dry to the touch is still curing underneath.
Handling Tips That Prevent Damage During Install
- Wear cotton or nitrile gloves. Fingerprints on glossy acrylic are easy to see and hard to buff out.
- Carry the print vertically, by its edges. Carrying it flat lets large panels flex.
- Use a helper for anything over 24x36". The problem isn't the weight. It's lining up hidden hardware while you can't see behind the print.
- Dust with a damp microfiber cloth. Acrylic builds up static and attracts dust quickly after the film comes off. Never use ammonia glass cleaners or alcohol on the acrylic face.
Troubleshooting After It's Up
- The print tilts after a few days: It's on a single hook, or the two hooks are at different heights. Add a second hook or re-level the pair.
- The bottom edge sits away from the wall: The hanging point is too far below the top edge. Add bumpers to the bottom corners, or tighten the wire.
- It rattles or shifts when a door closes: Add museum putty behind the bottom corners.
- Hairline cracks near the standoff holes: The caps are too tight. Loosen them right away. The cracks won't disappear, but they'll stop spreading.
- A slight bow in large, thin prints: The acrylic is too thin for its size. Moving it to a cleat with a full subframe usually fixes this.
Hanging Several Acrylic Prints Together
- Diptychs and triptychs: Leave 2 to 3 inches between panels. Use one long level or a laser line across all of them, because a small height difference is very noticeable next to straight edges.
- Gallery walls: Cut paper templates for every piece, tape the whole layout up, and live with it for a day before drilling.
- Mixed hardware: If some prints use standoffs and others use cleats, the standoff pieces will sit farther from the wall. Pick the same float depth for the whole group if you can.
Frequently Asked Questions
How do I hang an acrylic print in a rental without losing my deposit?
For small prints, adhesive strips leave no mark. For larger ones, two small hooks leave pinholes that a bit of spackle hides completely. Standoff anchor holes are bigger, so check your lease or ask your landlord first.Can I switch an acrylic print from landscape to portrait?
With standoffs, you can if the four holes form a square pattern. Otherwise, you need to drill new wall holes to match. Cleats and wire only work in one orientation unless the lab added hardware on a second edge.Can I lean an acrylic print on a shelf instead of hanging it?
Yes. A picture ledge with a front lip works well for prints up to medium size. Put a thin non-slip pad under the bottom edge, and keep leaned prints away from walkways where they can be knocked.How do I hang an acrylic print on a door?
Use strips or bonded hardware only, and only for light prints. Most interior doors are hollow, and repeated slamming works screws loose over time. Add putty at the bottom corners to stop the print from swinging.Can acrylic prints hang outdoors or on a covered patio?
Acrylic itself handles weather, but inks, face-mount adhesives, and wooden subframes generally aren't made for it. Use only prints the lab specifically sells as outdoor-rated, hang them with stainless steel standoffs, and keep them out of direct midday sun.How long does it take to hang an acrylic print?
Adhesive strips take about 10 minutes, plus a short wait. Wire or D-rings take 15 to 20 minutes. Standoffs and cleats take 30 to 45 minutes for a first-timer, most of it spent measuring.How do I take an acrylic print off a French cleat?
Lift the print straight up about an inch until the cleats separate, then pull it toward you. If you added an anti-lift screw, remove that first, or you'll pull the wall cleat out with the print.